- This is the most flexible means of creating a parcel. The parcel object is created in the Sendcloud system, but the parcel is not immediately announced with the carrier.
- This gives you time to continue making changes to the parcel data and decide on a shipping method right up until the moment you’re ready to create the label.
- Parcels can be processed either via the Sendcloud platform, or you can perform all interactions via the API, depending on your specific use case.
- This method is described in more detail at the end of this tutorial.
Before you begin
- Make sure you’ve completed basic account set up. See Quickstart
- You’ll need to have obtained your API keys so you can authenticate with our API. See Authentication
- You’ll need access to a tool that allows you to make API calls. Examples are Postman and Insomnia.
The Create a parcel or parcels API endpoint
Parcels are created by sending a HTTPPOST request to the Create a parcel or parcels endpoint.
Request method and URL
Authorization header
Every time you make an API call, you need to authenticate your connection to Sendcloud by including your API keys through a HTTP header.Authorization header
Step 1: Prepare your request
In the body of your HTTP request, you need to specify all the required information for the shipping label. Below you can find an example which will create a parcel object in your Sendcloud account.Example request body
The important thing to note here is that the
request_label parameter is set to false. This allows you to create a
parcel without announcing it to a carrier or creating a shipping label.Other request fields
There are many other additional fields that you can specify when creating a parcel. An example would be thesender_address parameter which lets you ship a parcel from a different sender location, or the parameters related to customs information for international shipping.
You can find a list of the supported fields in our API reference.
Step 2: Send your request
Take the example above, and use it to make aPOST request to http://panel.sendcloud.sc/api/v2/parcels.
Request method, URL, and Authorization header
parcel object in the response body.
See an example of the response body in the API reference.
Some things to note about the response
- The newly-created parcel will be assigned a parcel
id, e.g."id": 189169249. This is the unique parcel identifier which we will use whenever we want to update a parcel or create the label via the API. - The current status of the newly-created parcel will be
"No label". It will appear in the Sendcloud platform under the Incoming order view with the message Ready to process until we create a label for it.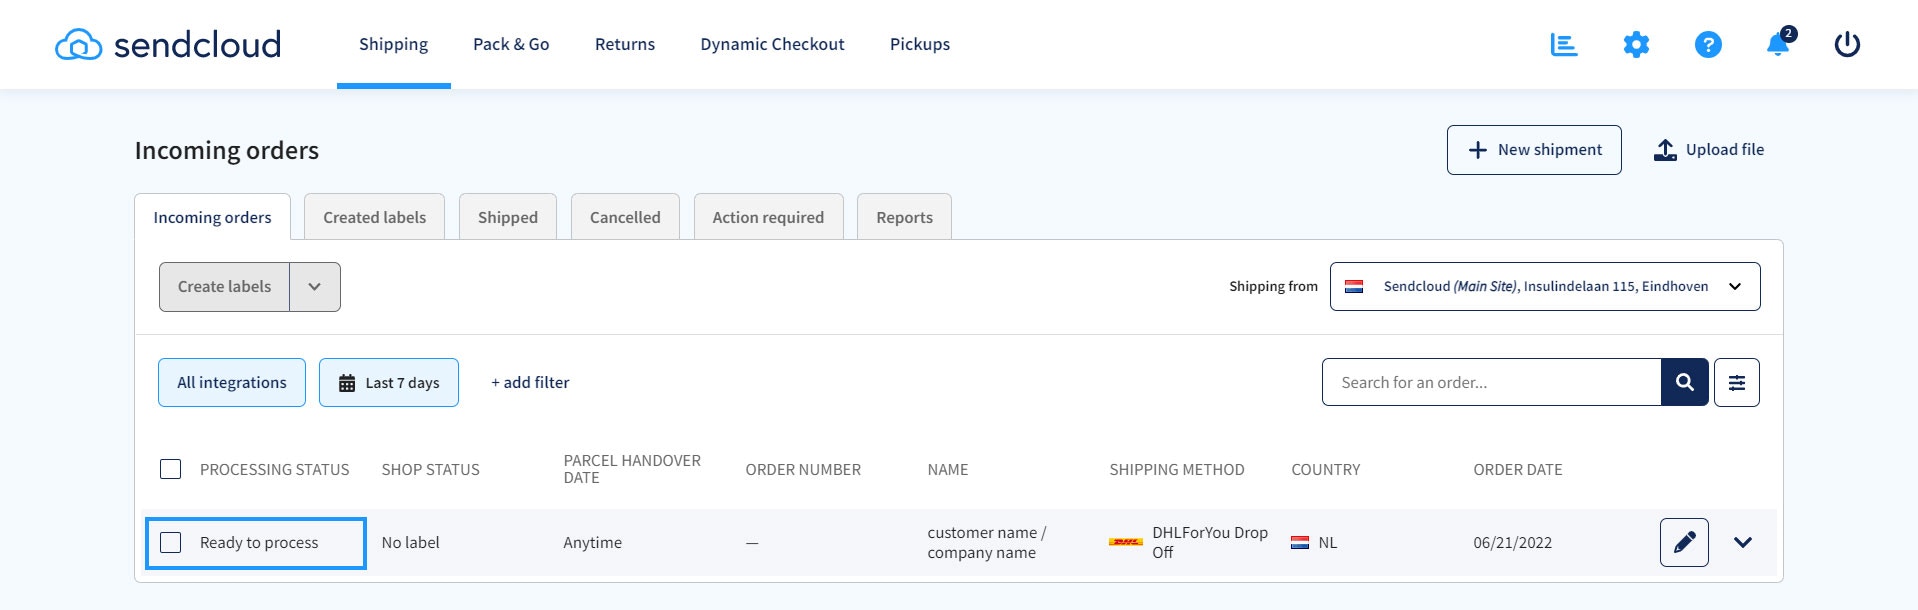
Step 3: Create the shipping label
To create shipping labels via the API, you need to use the Update a parcel endpoint to update the value ofrequest_label to true.
Via this endpoint, you can also make changes to any of the properties that can be used for creating a parcel.
Generating a label for an existing parcel
In this example, we will update parcel"id": 1 as follows:
- Create the shipping label by providing the data
"request_label": true - Change the
nameof the recipient to a new value - Change the shipping method by providing the corresponding
id. In this example, we’ll be using the method “Unstamped letter” to create a test label.
Request method, URL, and Authorization header
Example request body
PUT request to the Update a parcel endpoint. Make sure to include your authentication and content headers, as you did in Step 2.
If everything goes well, you should receive a response similar to the one below:
Example response body
name, and that the parcel status is now “Ready to send”. The shipping method has been updated to “Unstamped letter”.
Step 4: Download the shipping label
At the end of the previous step, you should have received a response which contains some URLs under thelabel field. These URLs are your links to download the shipping label. Labels can be downloaded in PDF format and are provided in A4 size for normal printers, and A6 size for label printers.
Under normal_printer, the start_from value indicates the position of the label on an A4 size page:
0= Top left1= Top right2= Bottom left3= Bottom right
GET request to the URL of the label you want to access, and including the Authorization header.
Request method, URL, and Authorization header
Next steps
You can continue reading more tutorials or dive directly into exploring our API references.- Choose a shipping method - learn how to retrieve the full list of shipping services available to you via Sendcloud
- Tracking parcels - to see how you can track the delivery journey of your newly created parcel as it travels to your customer
- Create a return - read how you can create a return parcel shipment using the Sendcloud Returns API
- API v2 reference and API v3 reference - browse our API references to explore more options for creating parcels and managing your shipping processes.
Advanced options
Create a parcel and immediately request a label in a single API call
If you already know which shipping method you want to use to send your parcel, you can bypass Step 3 above by making aPOST request to the Create a parcel or parcels endpoint, including "request_label": "true".
When directly announcing parcels in this way, the
shipment field is mandatory, and a shipping method id and name
must be provided in the API request. If you’re shipping parcels
internationally, pay attention to the additional fields which become
mandatory for customs documentations purposes. A full list of required parameters can be found in the API
reference.Create a return parcel
You can use the Create a parcel or parcels endpoint to create return labels via the API. The process for creating a return label via this method is the same as for creating a parcel, but you must set the value of theis_return property to true and specify the customer’s address address in the from_* fields.
It’s important to note that standard shipping methods don’t apply to return parcels. You can find an overview of available return methods via the List of all shipping methods endpoint and include the parameter "is_return": true.
You can also create returns using the Returns API by following the Create a return
guide.